This guide will walk you through creating your first pod on Kloud Team. Pods are containerized environments that run your AI workloads with dedicated compute resources.
What You'll Need
Kloud Team Account
Before you can create a pod, you need an Kloud Team account. If you don't have one yet:
- Sign up at Kloud Team
- Verify your email address
- Complete your profile setup
Your AI Model or Application
Have your AI workload ready to deploy. This could be:
- A Docker image with your model
- A GitHub repository with your code
- A pre-trained model from our marketplace
Creating Your First Pod
Access the Dashboard
Log in to your Kloud Team account and navigate to the Pods section from the main dashboard.
Click the Deploy Wizard button to begin.
Choose Your Compute Type
Select the type of compute resources that best fits your workload:
GPU Compute:
- NVIDIA GPUs
- Accelerated computing for AI/ML workloads
- Perfect for model training and inference
- CUDA and cuDNN pre-configured
- Ideal for deep learning, computer vision, and LLM tasks
CPU Compute:
- High-performance CPUs
- Cost-effective for general workloads
- Best for data processing, web services, and APIs
- No GPU overhead costs
- Suitable for preprocessing, batch jobs, and non-GPU tasks

Recommendation:
Choose GPU Compute if your workload requires deep learning, model training, or inference. Choose CPU Compute for data processing, web applications, or when GPU acceleration isn't needed.
Choose Your Instance
Select the hardware configuration that matches your workload requirements:
- NVIDIA GPUs: (Nvidia 1g.10gb-mig, Nvidia 2g.20gb-mig, Nvidia 3g.40gb-mig, Nvidia 7g.80gb-mig)
- Intel CPUs: (Intel 2vCPU.4gb, Intel 4vCPU.8gb, Intel 8vCPU.16gb)
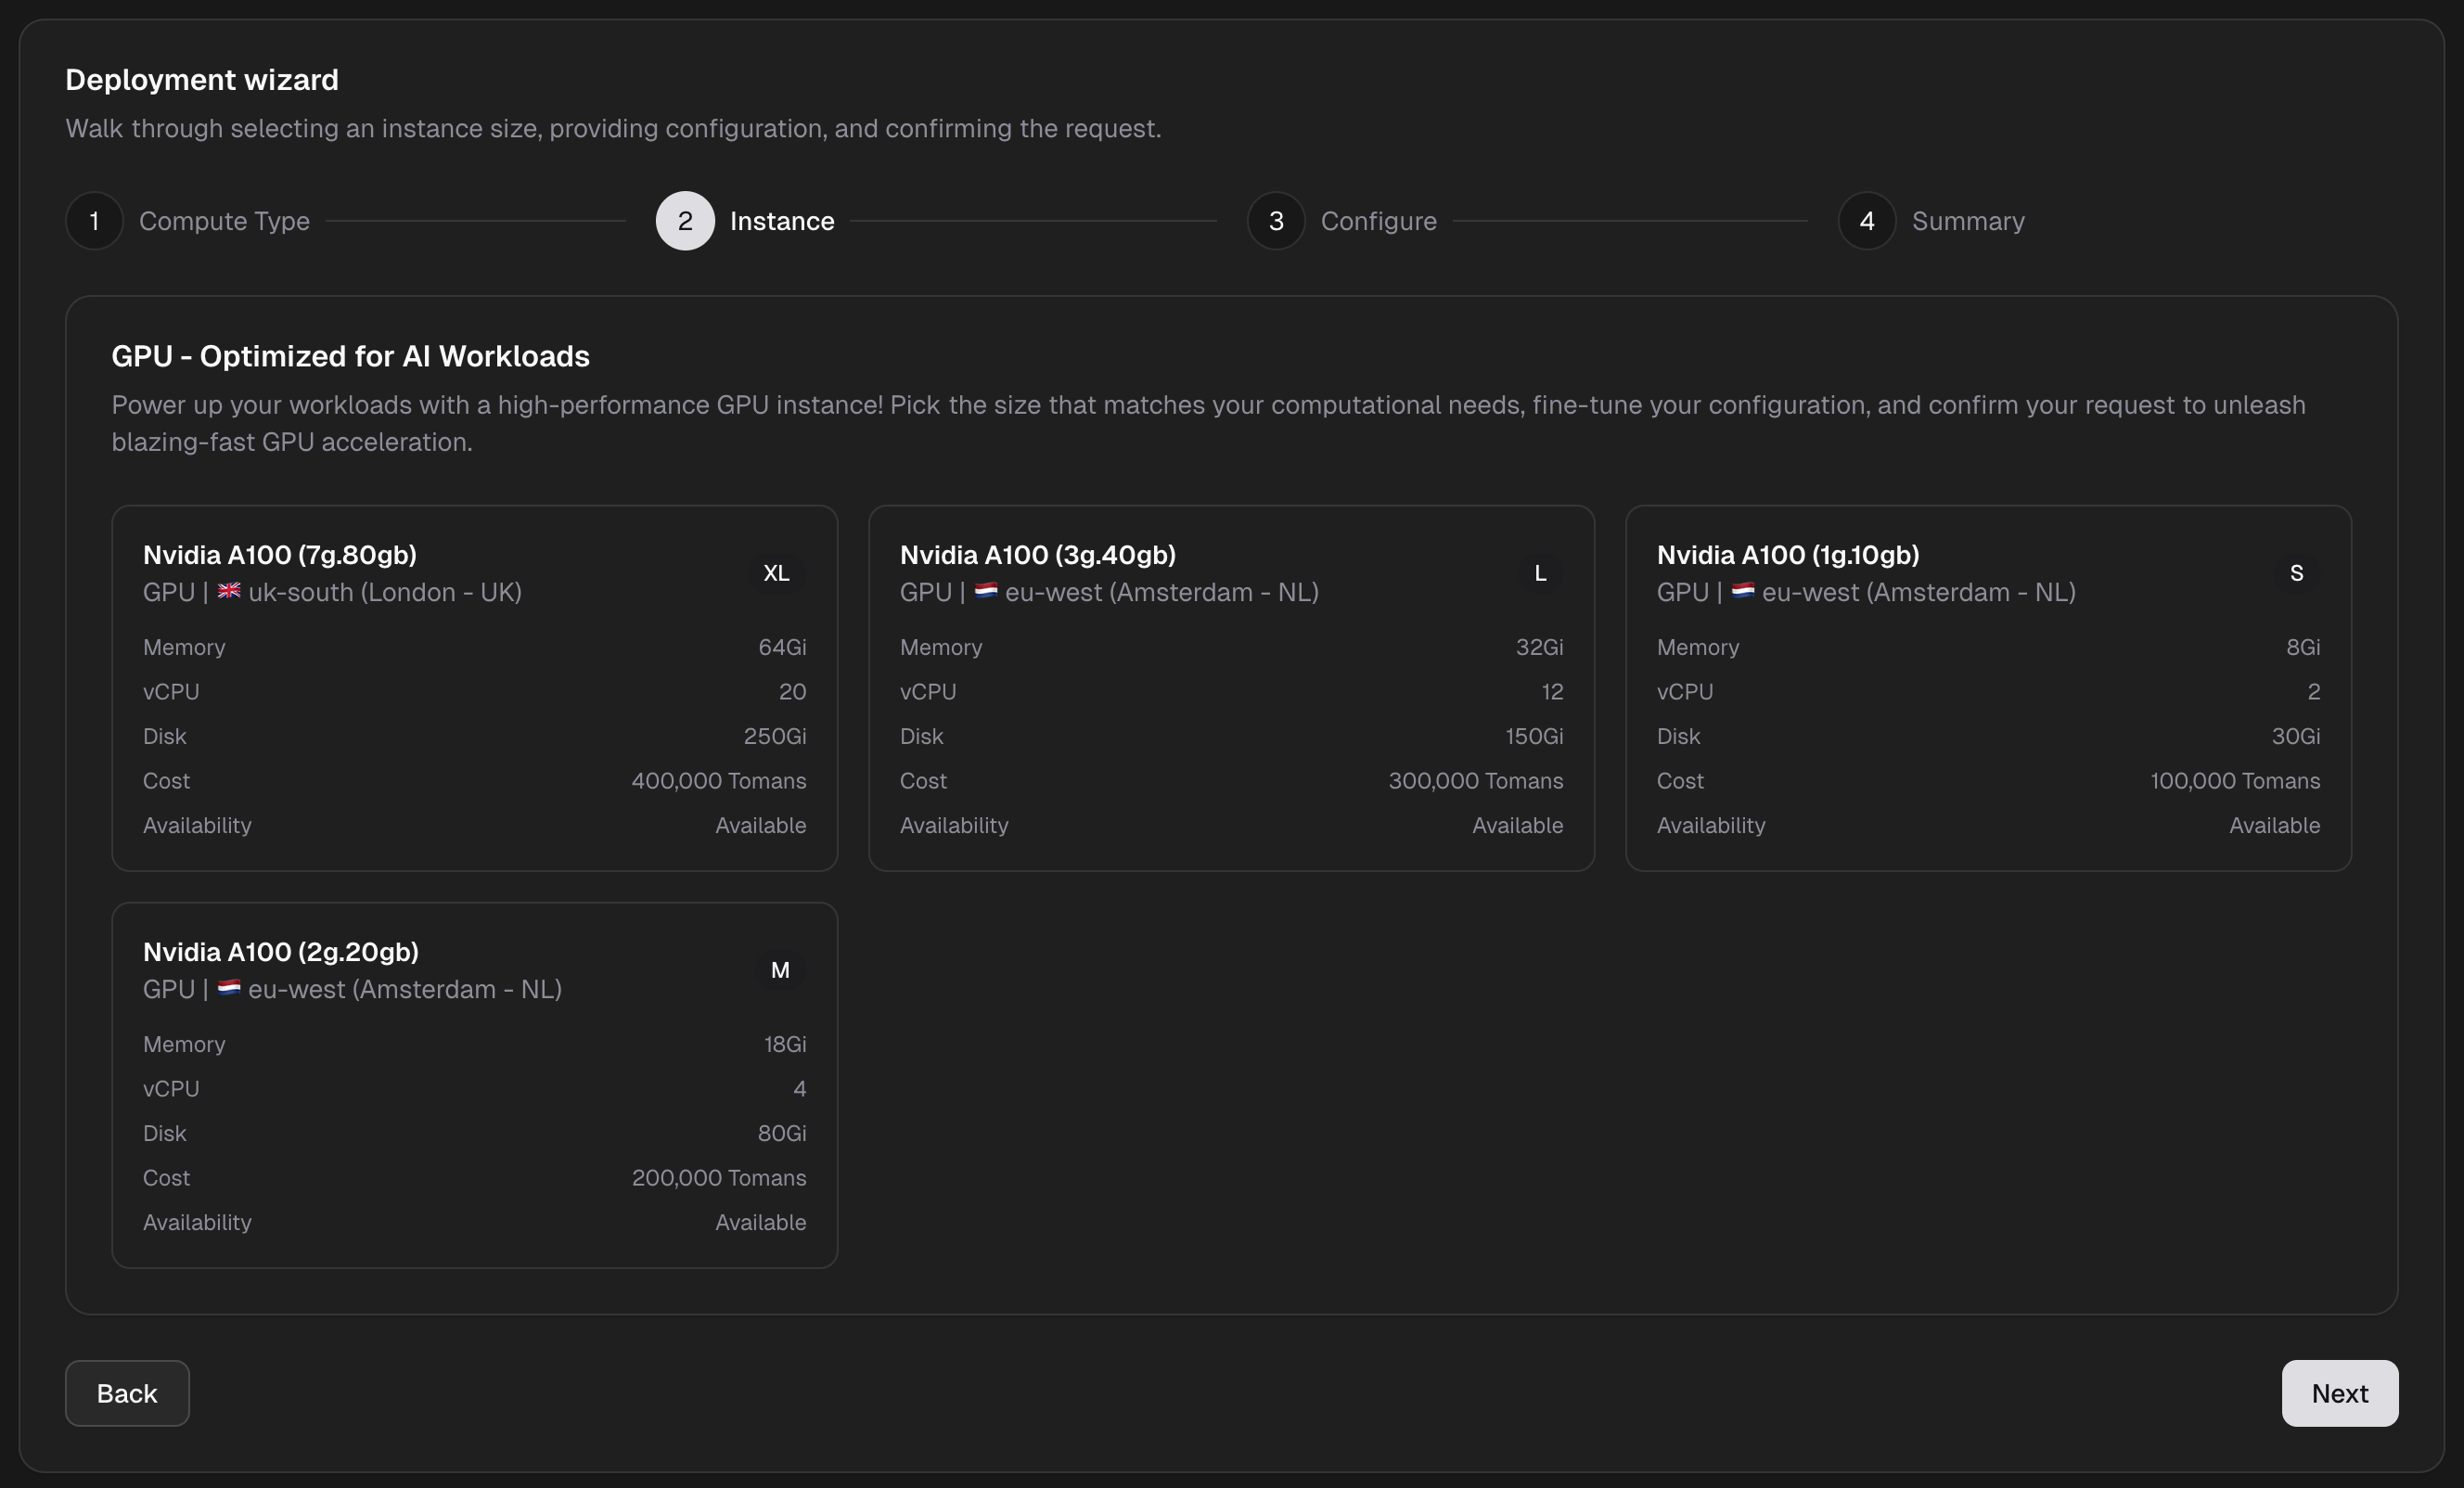
The instance selection interface shows you:
- Available GPU/CPU options
- Memory and storage specifications
- Pricing per hour
- Availability in different regions
GPU Selection Tip:
For basic learning tasks, start with a Nvidia 1g.10gb-mig for inference or 7g.80gb-mig for training.
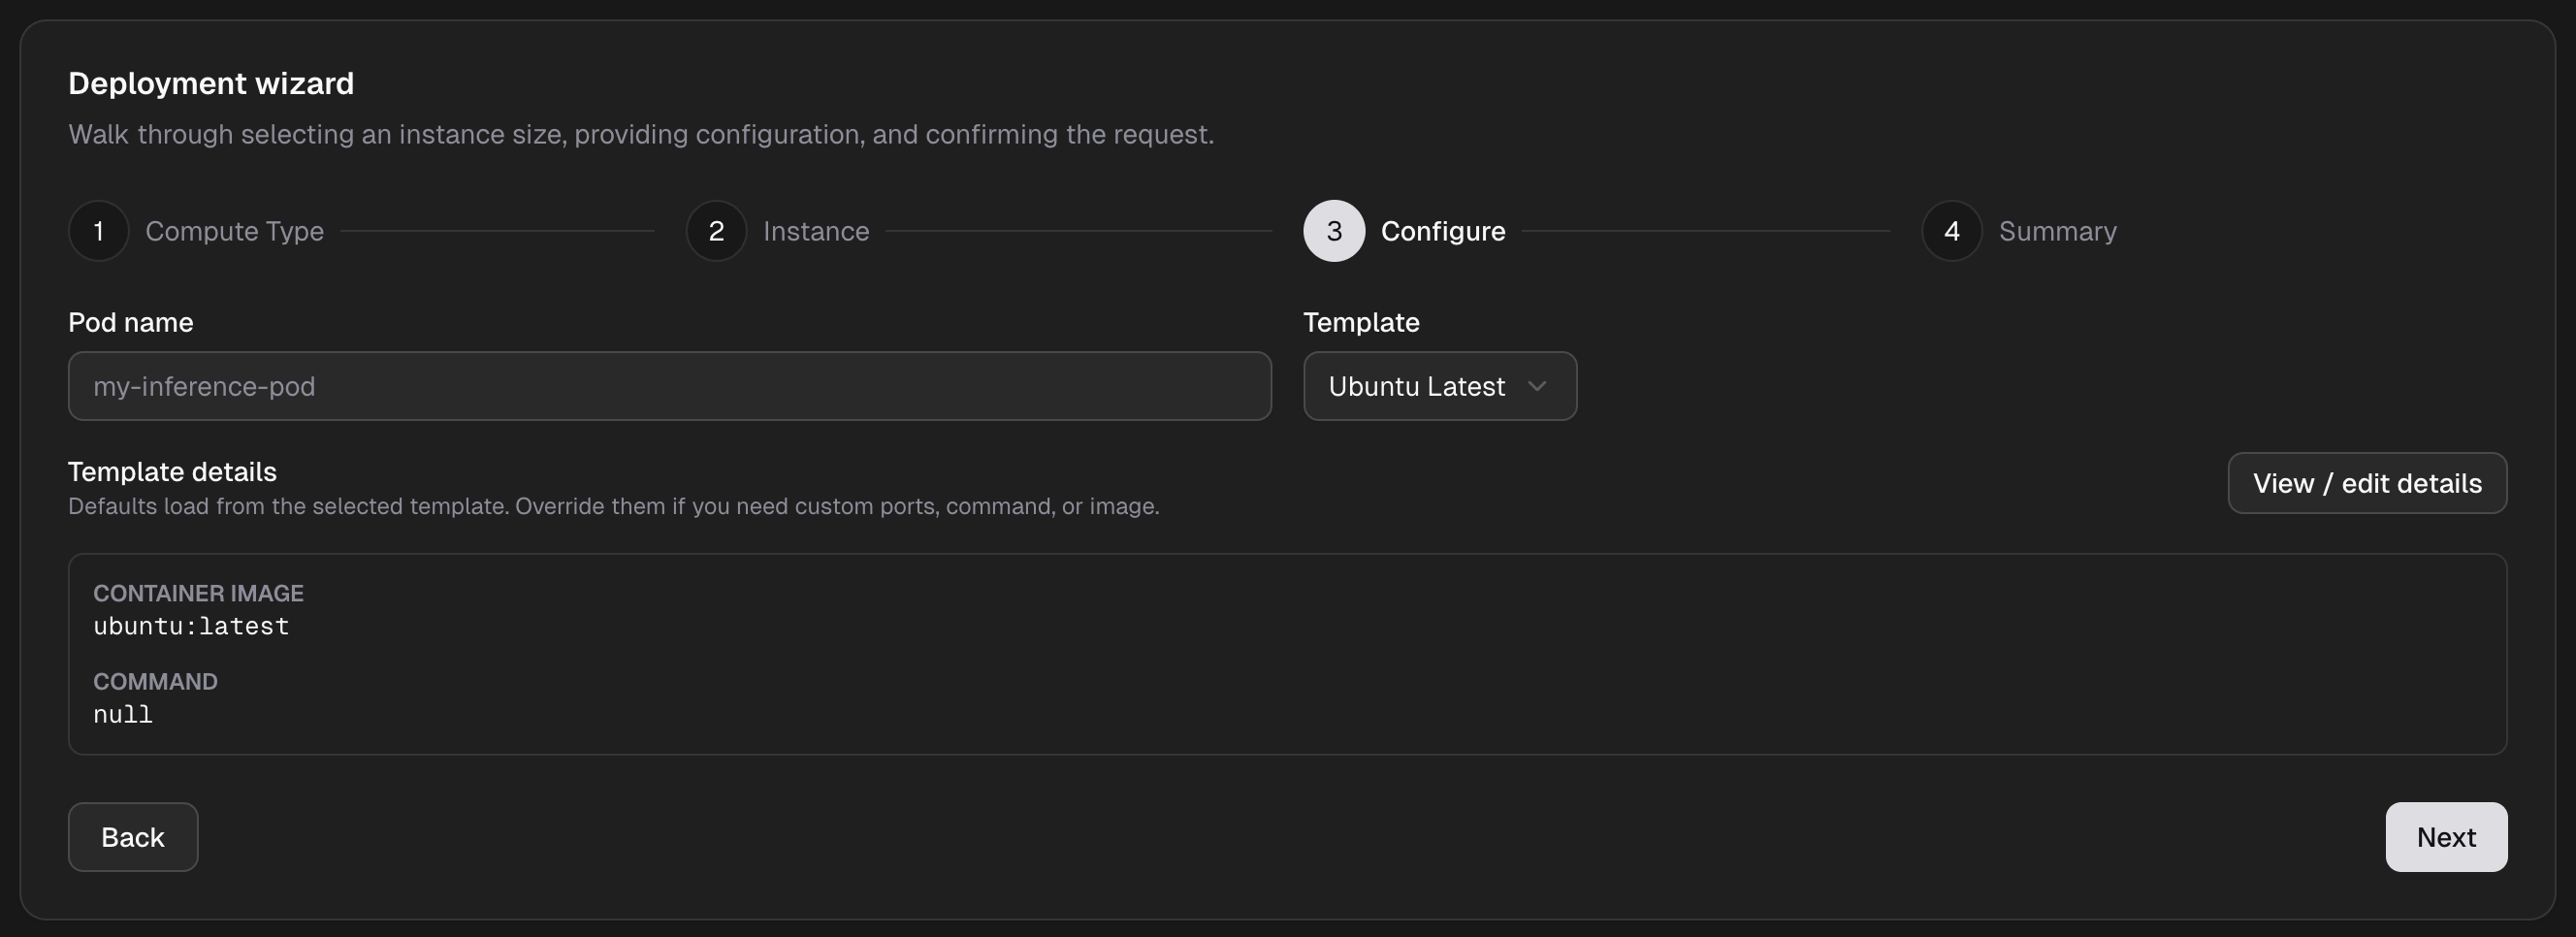
Configure Your Pod
Customize your pod settings to match your specific requirements:
Basic Configuration:
- Pod Name: Give your pod a descriptive name (e.g.,
my-first-pod) - Select Template: Click on the template dropdown to see available templates to use and select one of them
Advanced Settings: Click on View / edit details to:
- Docker Image: Specify your container image or choose from templates
- Start Command: Custom entrypoint or startup script
- Environment Variables: Set configuration values securely
- HTTP Service: configure your proxy http services
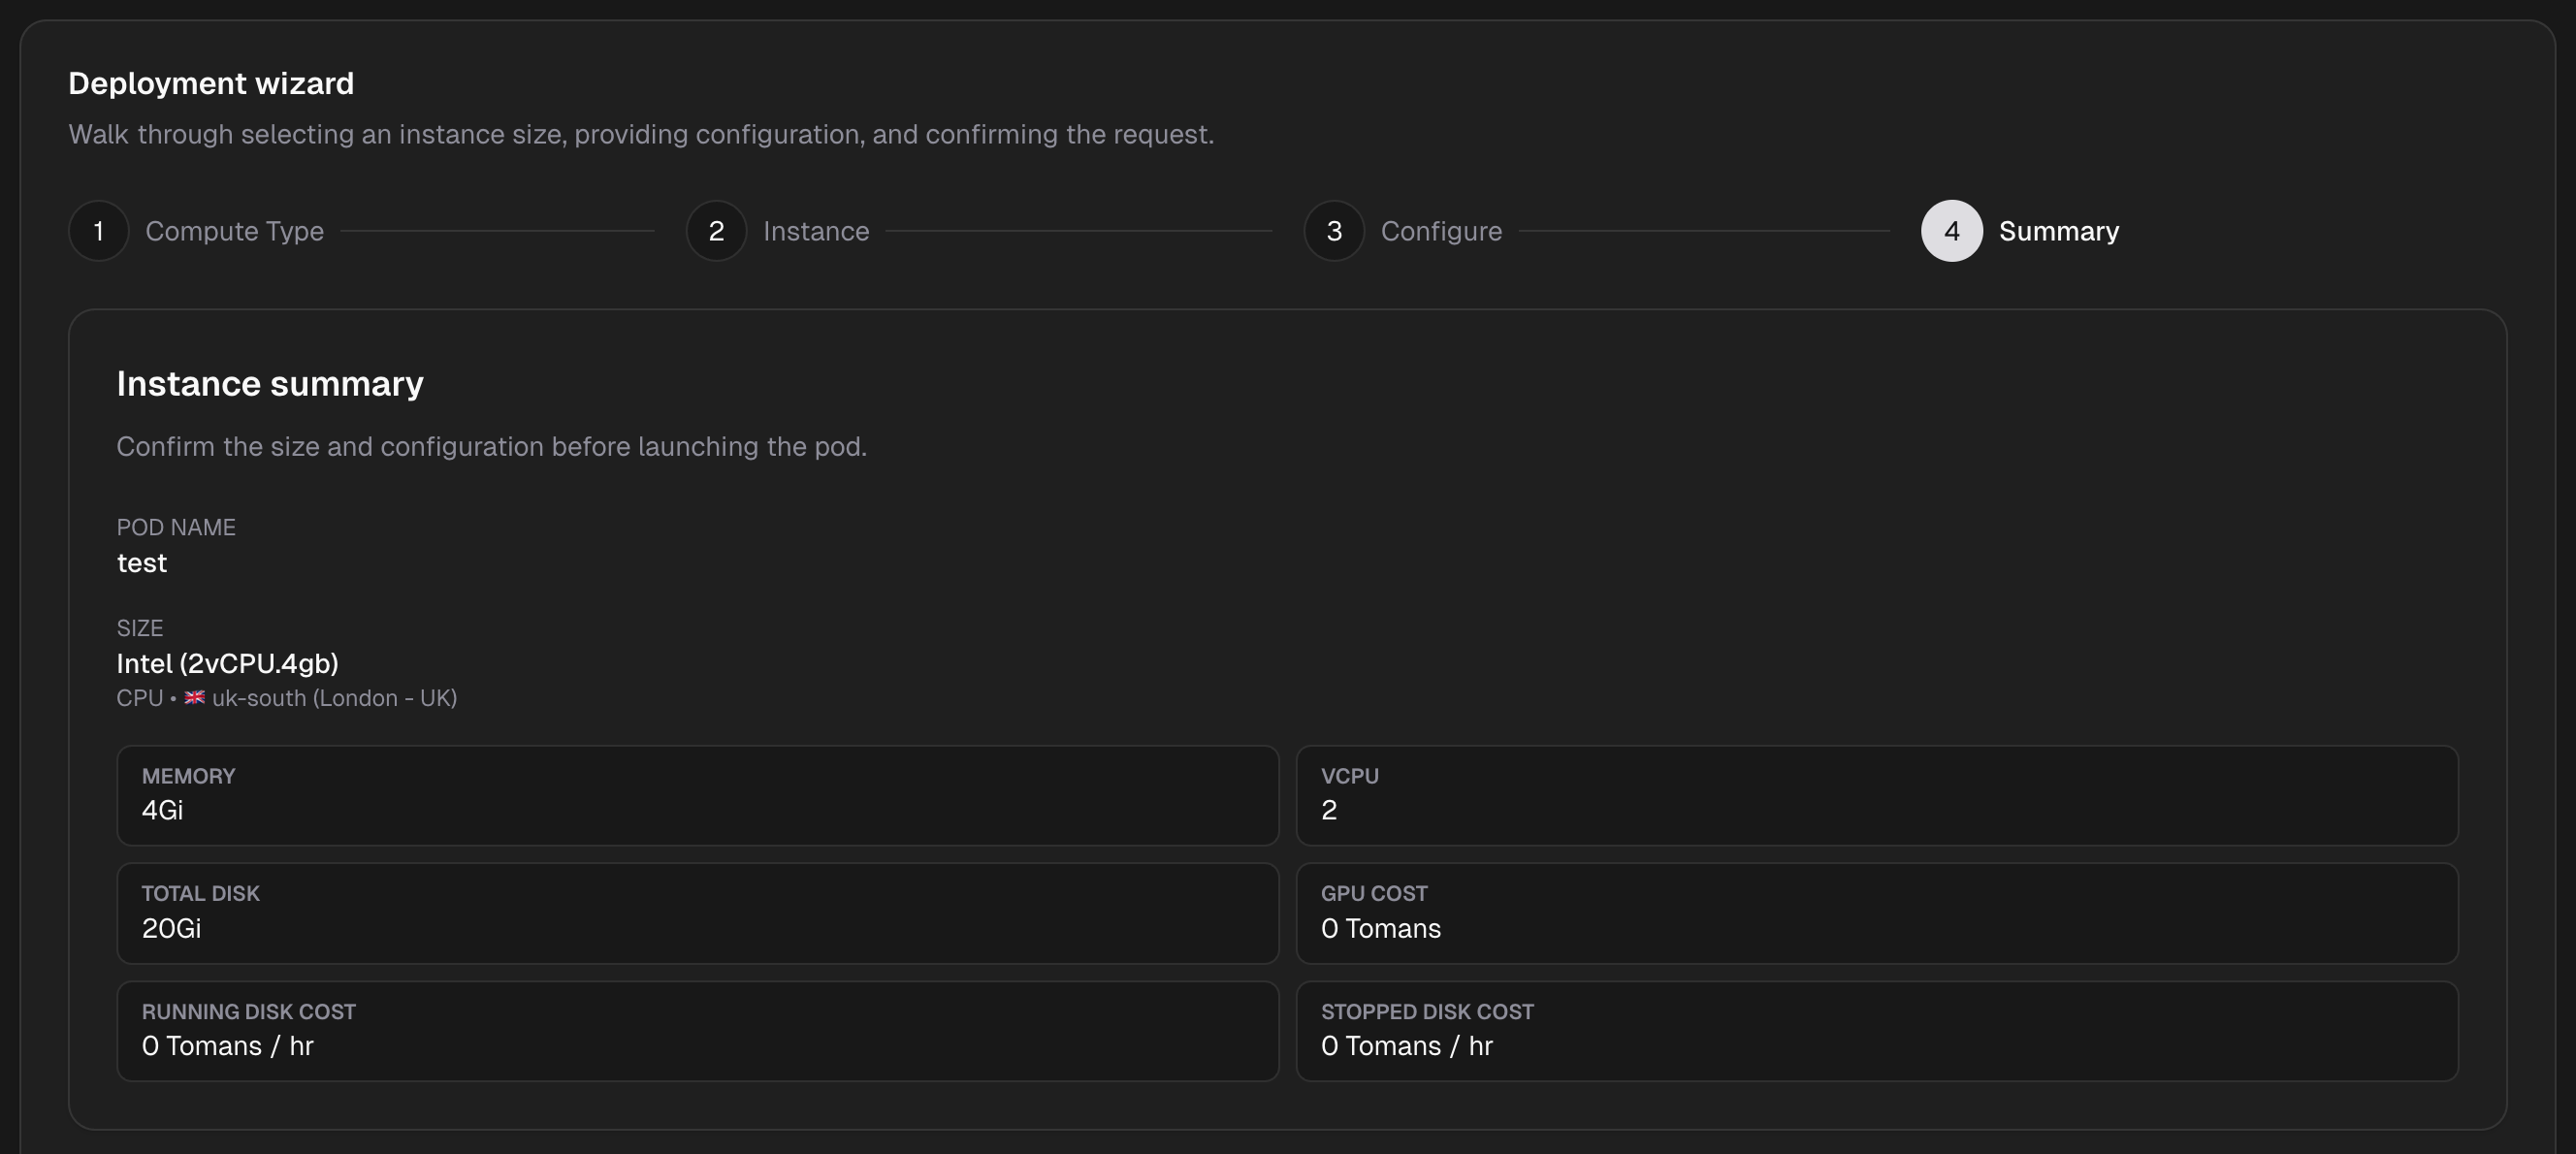
Summary And Deploy
Review all your pod settings before deployment:
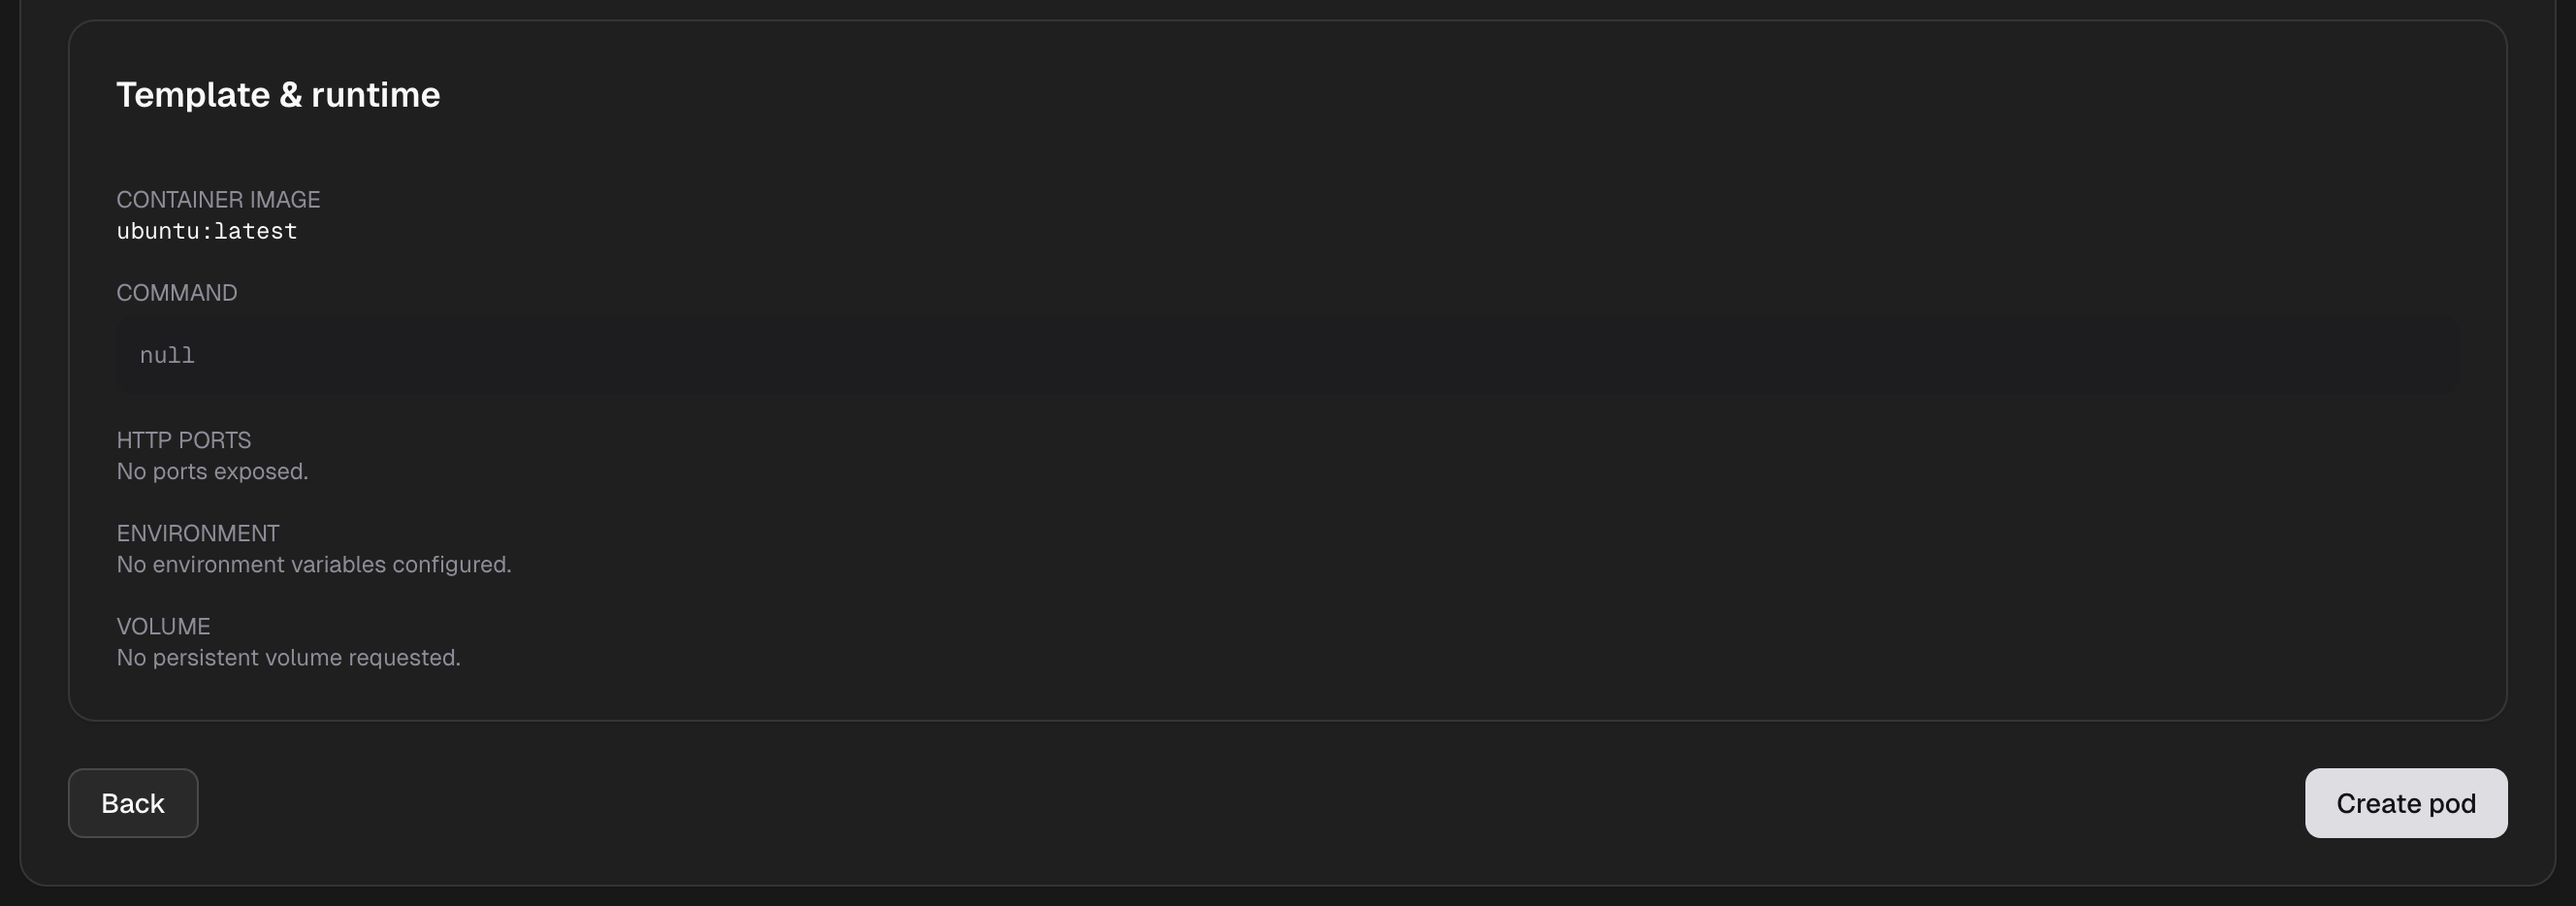
Deploy Your Pod:
Once you've reviewed everything, click the Deploy button. Your pod will:
- Provision the selected resources
- Pull the Docker image
- Initialize the environment
- Start your services
- Become accessible within 30-60 seconds
What Happens Next:
After deployment, you'll be redirected to your pod dashboard where you can:
- Monitor real-time logs
- Access SSH Pod Connect
- Access HTTP proxy services
- View resource utilization metrics
- Manage your pod lifecycle (stop, restart, terminate)
Troubleshooting
Common Issues:
Pod won't start:
- Check your Docker image is valid
- Verify resource limits aren't exceeded
- Review logs for startup errors
Out of memory:
- Upgrade to a pod with more RAM
- Optimize your model's memory usage
- Enable model quantization
Slow performance:
- Consider upgrading to a GPU pod
- Check for network bottlenecks
- Profile your code for optimization opportunities